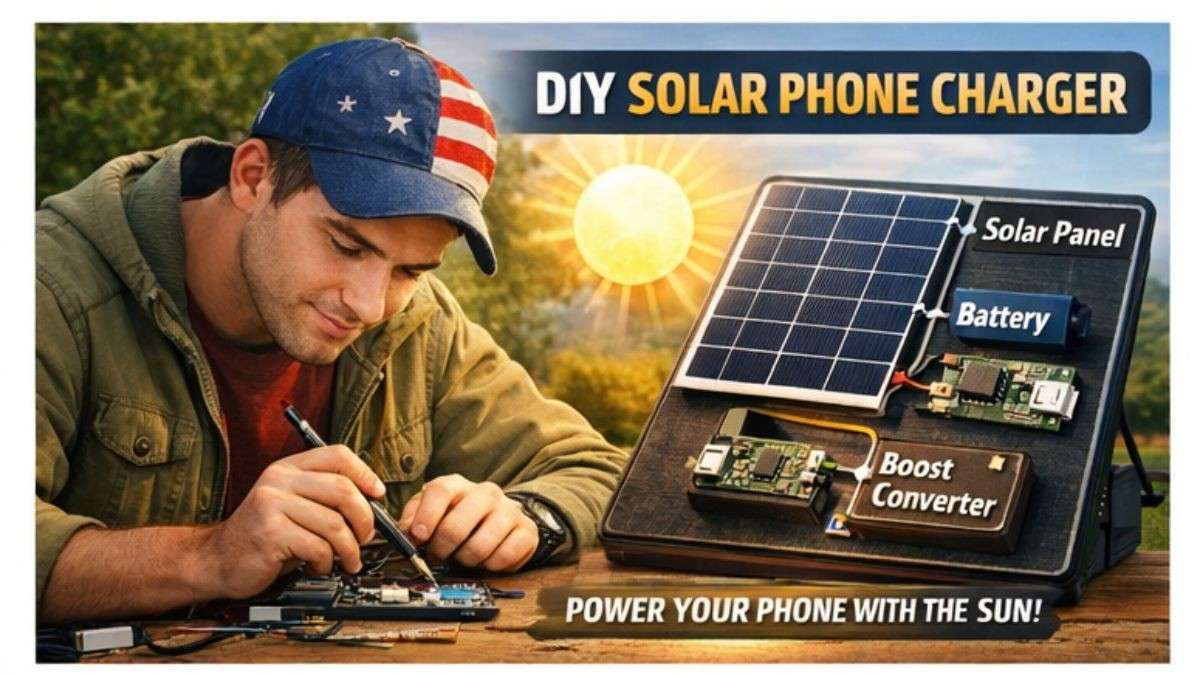
Introduction: Solar-Powered Phone Charger
Imagine this: You are on a hike, your phone battery is almost dead, and there is no socket in sight. But the sun is shining bright. What if you could charge your phone with just sunlight? That is where a solar phone charger comes to the rescue.
Building a solar charger is fun, eco-friendly, and super useful. You do not need to be an engineer—anyone can do it with a few simple materials and a little patience. In this guide, we will take you through every step, including materials, assembly, testing, pros & cons, and market insights.
Materials You’ll Need
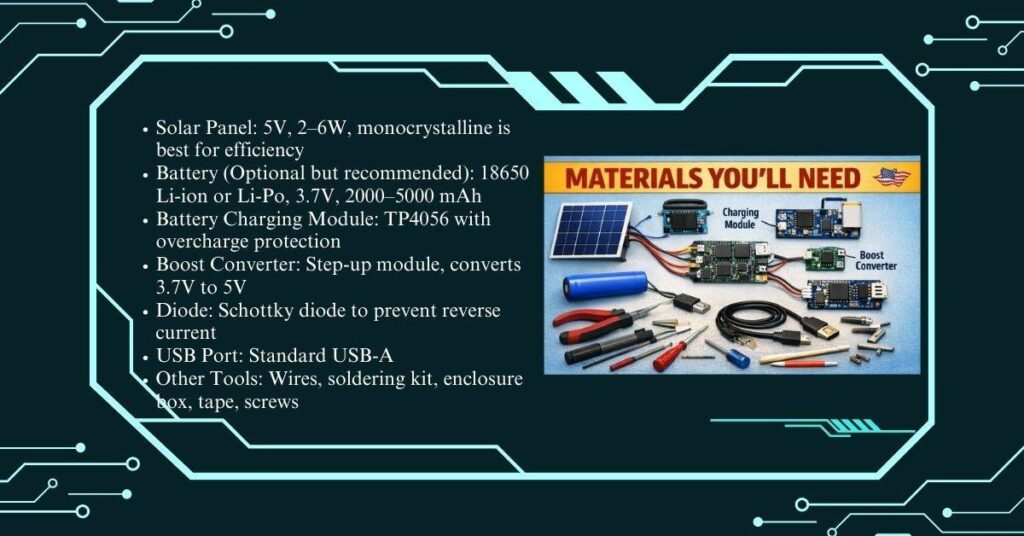
Here is what you will need to make your charger. Most of these are easy to find online or at an electronics store:
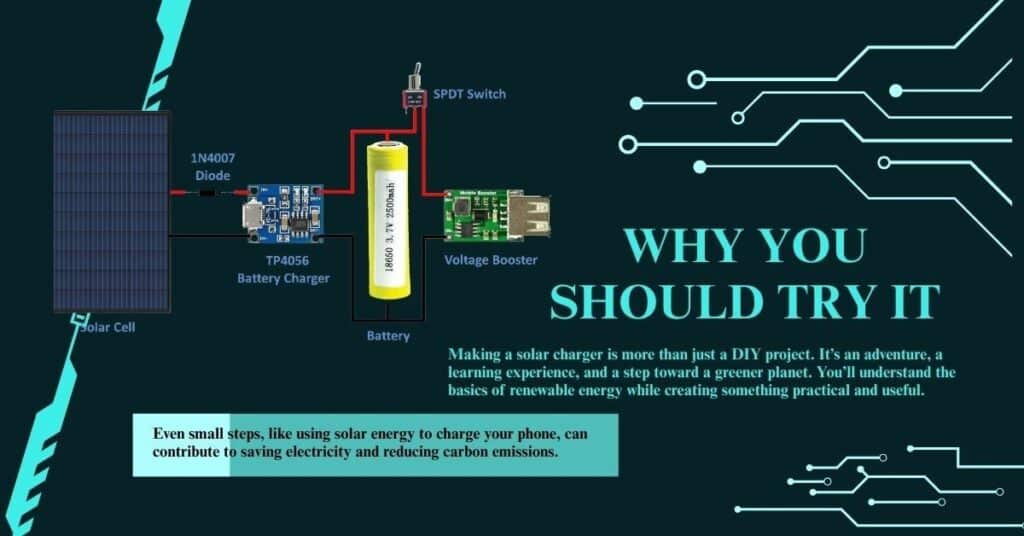
Main Components:
- Solar Panel: 5V, 2–6W, monocrystalline is best for efficiency
- Battery (Optional but recommended): 18650 Li-ion or Li-Po, 3.7V, 2000–5000 mAh
- Battery Charging Module: TP4056 with overcharge protection
- Boost Converter: Step-up module, converts 3.7V to 5V
- Diode: Schottky diode to prevent reverse current
- USB Port: Standard USB-A
- Other Tools: Wires, soldering kit, enclosure box, tape, screws
Solar-Powered Phone Charger: Step-by-Step Process
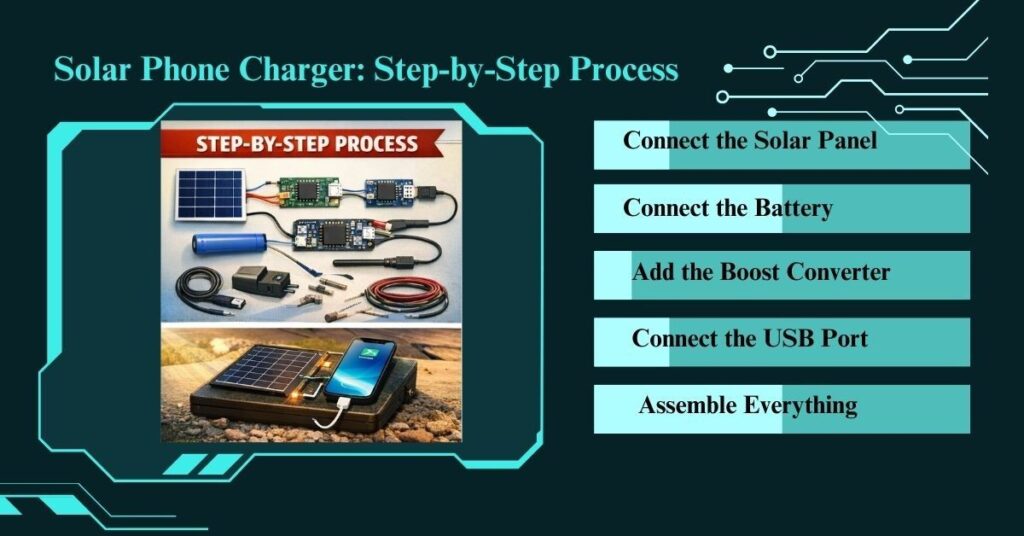
Follow these steps carefully for a safe and working solar charger:
Step 1: Connect the Solar Panel
- Connect the positive and negative wires of the solar panel to the charging module’s input.
- Add a Schottky diode in the positive line to stop the battery from discharging at night.
Step 2: Connect the Battery
- Attach the battery to the B+ and B- terminals of the charging module.
- Double-check the polarity to avoid damage.
Step 3: Add the Boost Converter
- Connect the battery output to the boost converter.
- Adjust the output to 5V using the module’s small potentiometer.
Step 4: Connect the USB Port
- Attach the USB output to the boost converter’s output.
- Test with a multimeter: it should read around 5V.
Step 5: Assemble Everything in an Enclosure
- Place the solar panel on top, facing the sun.
- Keep the battery and modules safely inside.
- Optionally, add a switch to control charging.
Other Important Article Regarding DIY Solar USB Charger – Altoids
Testing Your Solar-Powered Phone Charger

- Place the solar panel under direct sunlight.
- Measure the voltage with a multimeter. It should be around 5V at the USB port.
- Connect your phone. It should start charging automatically.
- If using a battery, your phone can charge even in cloudy weather or at night.
Pros & Cons of a DIY Solar-Powered Phone Charger
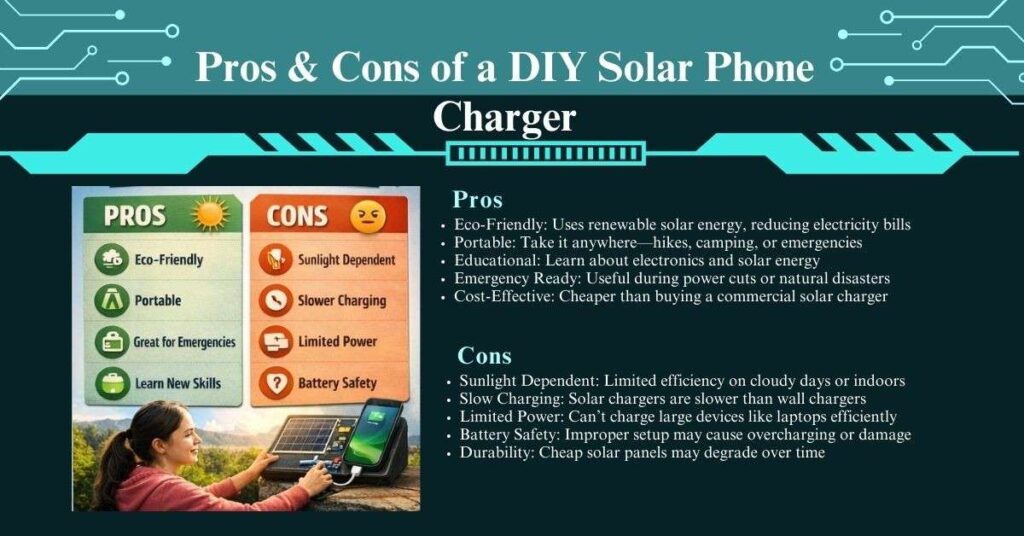
Pros
- Eco-Friendly: Uses renewable solar energy, reducing electricity bills
- Portable: Take it anywhere—hikes, camping, or emergencies
- Educational: Learn about electronics and solar energy
- Emergency Ready: Useful during power cuts or natural disasters
- Cost-Effective: Cheaper than buying a commercial solar charger
Cons
- Sunlight Dependent: Limited efficiency on cloudy days or indoors
- Slow Charging: Solar chargers are slower than wall chargers
- Limited Power: Can’t charge large devices like laptops efficiently
- Battery Safety: Improper setup may cause overcharging or damage
- Durability: Cheap solar panels may degrade over time
Tips to Solve Common Problems
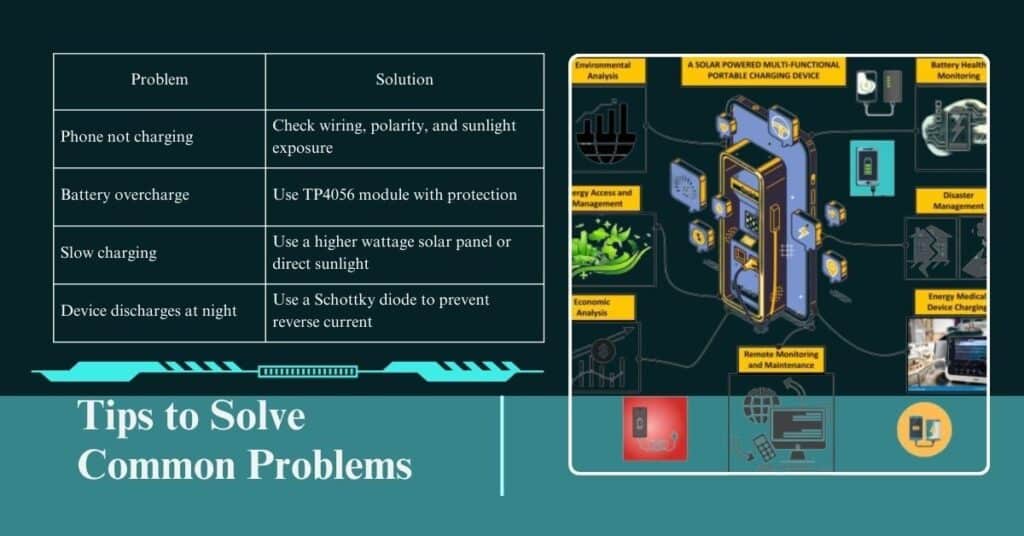
| Problem | Solution |
| Phone not charging | Check wiring, polarity, and sunlight exposure |
| Battery overcharge | Use TP4056 module with protection |
| Slow charging | Use a higher wattage solar panel or direct sunlight |
| Device discharges at night | Use a Schottky diode to prevent reverse current |
Market Insights
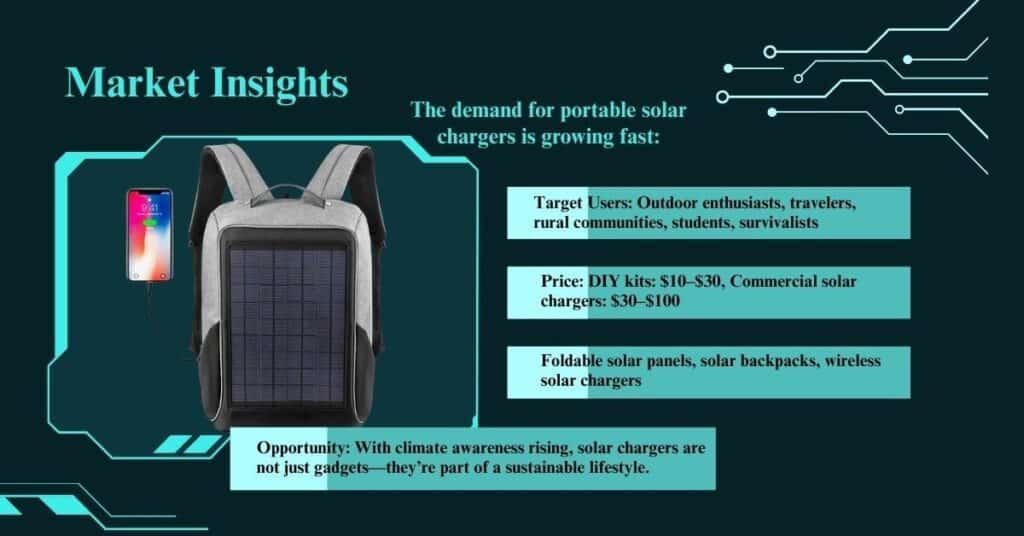
The demand for portable solar chargers is growing fast:
- Target Users: Outdoor enthusiasts, travelers, rural communities, students, survivalists
- Price: DIY kits: $10–$30, Commercial solar chargers: $30–$100
- Trends: Foldable solar panels, solar backpacks, wireless solar chargers
Opportunity: With climate awareness rising, solar chargers are not just gadgets—they’re part of a sustainable lifestyle.
How to build a Solar Mobile Charging Circuit DIY Electronic Kit
Why You Should Try It
Making a solar charger is more than just a DIY project. It’s an adventure, a learning experience, and a step toward a greener planet. You’ll understand the basics of renewable energy while creating something practical and useful.
Even small steps, like using solar energy to charge your phone, can contribute to saving electricity and reducing carbon emissions.
Final Thoughts on Solar-Powered Phone Charger
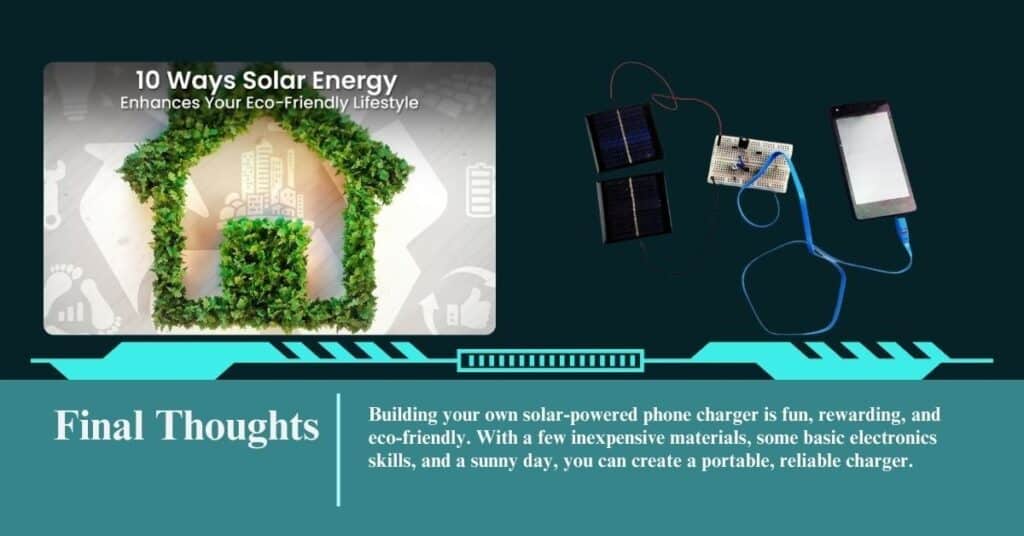
Building your own solar-powered phone charger is fun, rewarding, and eco-friendly. With a few inexpensive materials, some basic electronics skills, and a sunny day, you can create a portable, reliable charger.
So why wait? Start your DIY solar project today, and let the sun power your life!
Our Other Technology-Related Blogs:
How DRDO’s PCLR Technology Can Detect Stealth Fighters Like “ZET”
Walk-on-Water Technology Trends USA in the coming year 2026
Flying Cars Take Flight 2025-2027: How Silicon Valley Is Making It Real